Thursday, December 29, 2011

Nostalgia.

This time of year always has me thinking about my family, where I come from and how it/they have made me who I am today. Holidays can be particularly lonely and depressing when we think about the family that maybe hasn't always been there, loved ones that have faded into the dark. For myself, I am happy to know that the family I have, as small as it may be, as crazy as it may be, loves me unconditionally. They may fall in and out of our lives, but that doesn't mean they can't hold a special place in our hearts.

With these thoughts in my mind, I looked back to a silkscreen piece I had done last year about family. There has always been a missing link and a lot of confusion connected to it. I haven't seen my dad in 7 years, but on Christmas Day I did. It brought me back to that feeling of nostalgia.
Bittersweet. Complicated, yet clear. Intense and at ease.

Tuesday, December 27, 2011

The sky has a lot to say.

I like to look to the sky and see what the clouds have to say..
Sometimes it isn't much.
Sometimes, it's too powerful to tell.

Sunday, December 18, 2011

Haiku.

I put together some haikus with my photography for an Asian Religion class. Here are a few:


The idea is to have written haikus that embody Zen Buddhism. Nature is a primary topic in such haikus. The words are supposed to carry heavy imagery with an awakening spirit within it's short verses.

Saturday, December 10, 2011

Tuesday, December 6, 2011

Psychedelic.

These are inspiring posters, such beautiful colors. I plan on experimenting with black light images myself...


Sunday, December 4, 2011

New Pins!

New felt pins have made their way into my etsy shop. I think this would look great pinned to a sweater or bag! More to come...

Friday, December 2, 2011

Mystified..

Copper etching, "Tree Runner"

Relief etching, "Trees"

Silkscreen print, "Oh, Hai!"

Thursday, December 1, 2011

Linoleum Stamp Part 2.

Now for putting together the signature booklet..

First, select the paper you like. I used Reeves BFK, which is a really nice, soft paper. You can really use anything you desire. Before you start cutting your paper into the size you wish, you need to figure out which way the grain of the paper is going. This will help you to decide which way the paper will want to naturally fold. Start by trying to fold the paper in half in either direction, which way does the paper seem to naturally fold with more ease? You can feel the resistance.

Now you can cut your paper to the desired size and fold all the pages into each other. There will always be a bit of paper hanging out of the end, trim it down.
Once you've trimmed everything to fit nicely, you can now print your image onto the cover of your booklet.

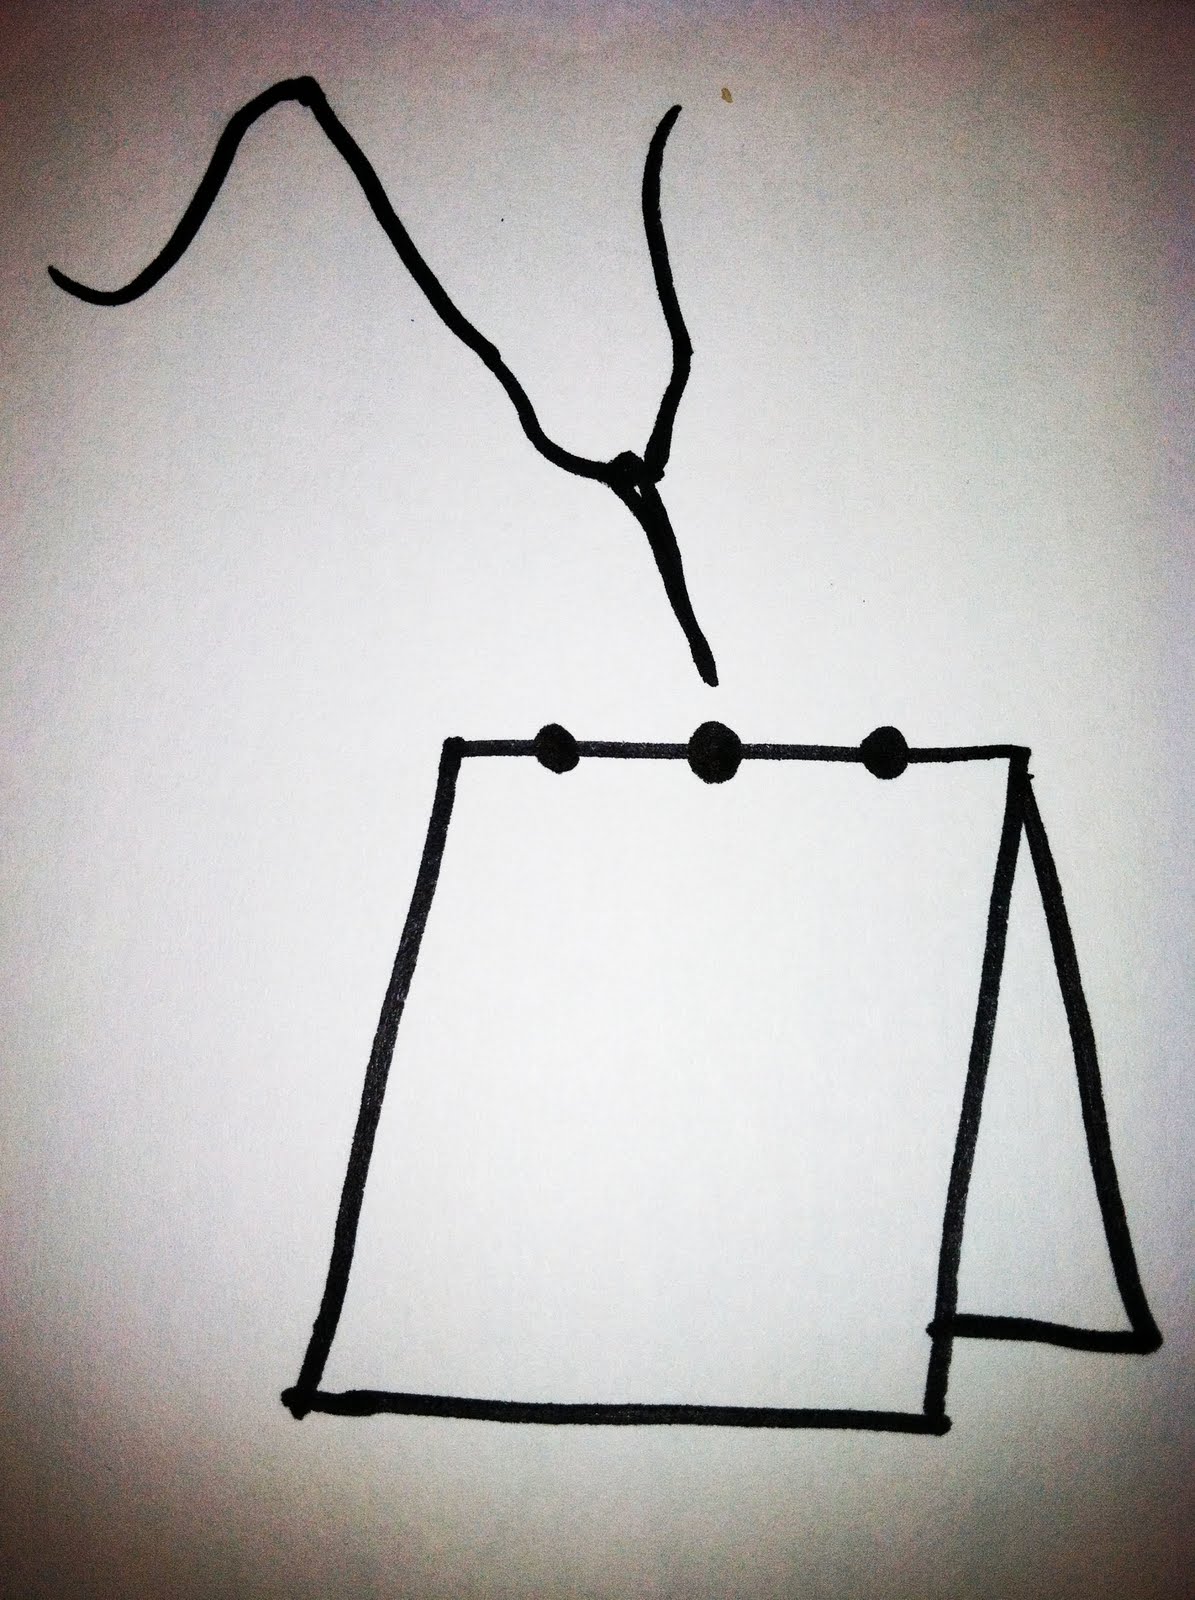
Now you are ready to put this all together! You will need an awl - or something similiar that you can find around the house (such as a nail).

Take your signature booklet and lay it open flat with the cover face up. Find the center and mark it with a small pencil mark. Then measure to equal distances from the center and mark that as well.

You want to poke a hole through the cover and sheets of paper all at the same time, going from the cover to the inside, so the puncture marks look nicer. Once you've done so, you are ready to thread up your needle with a waxed thread. I used waxed linen thread purchased at my local art store.

You are going to start with the center hole, from the cover side into the inner part.

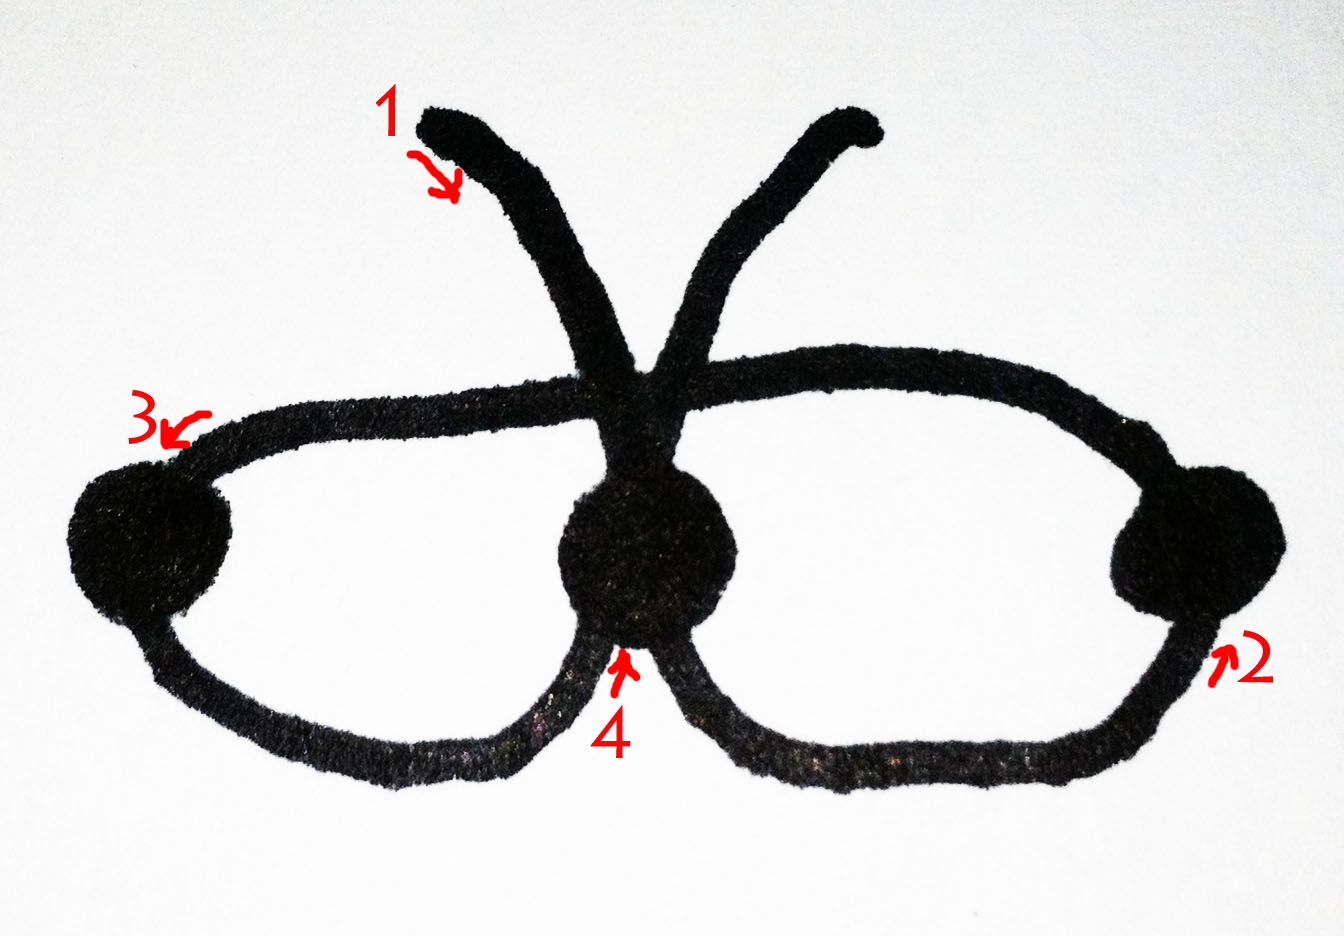
Start with step 1 (go through center hole inwards) leaving a tail of string.
2 - From the inside work your way out to the opposite end.
3 - Go back inwards and go back to the middle hole.
4 - Go through the middle hole once more. Now you have two strings left. Make sure all strings are tight without ripping the paper. Tie the two strings any way you choose.

I choose to make a knot, then a little bow. You can just knot it, or attach beads, whatever you like!

Now you have a completed signature booklet! Fun, cute, and very easy to do. Makes a rad gift, too!

Now go impress your friends! ;)

Wednesday, November 30, 2011

Linoleum Stamp Part 1.

Hi there! I made a new linoleum carving that I stamped onto a simple signature book that ANYONE can make. It's very easy! You can do it, too :)

First, you always start with a drawing. I drew this guy:
Next, you find yourself a piece of tracing paper, and trace away:


From this point, what I like to do is place this drawing pencil side down onto a block of linoleum. To transfer the image, simply draw over the backside of the drawing... as in this picture:


Once you've transferred, you can use a permanent marker to make sure your lines stay put.
Now the FUN part, carving!! Be sure to use a proper carving tool, such as a Speedball carving tool (which has a bunch of different cutter sizes):


Once I finish carving, as you have probably noticed, I eventually do away with those extra little designs on the outside of the triangle. I wasn't feelin' it, but it's ok, because you just carve it away. Just be careful, it's VERY easy to mistakenly carve something you don't mean to!!

For this print I will use Speedball block ink.
You can use a small brayer for this. I roll the ink onto a piece of tracing paper laid onto another piece of paper. You want to have enough ink on the brayer so that it has this sort of textured look to it:

Roll up your carving, ensuring it has the same textured look. Then, press down firmly onto paper.

So here's what my finished carving looks like (I even cut the block down) and a test stamp to see if I liked it.


Now that the image is established, we can move onto making the signature book. To be continued..